INTRO:
The holiday season is just around the corner, and what better way to embrace the festive spirit than by adorning your nails with fresh and glowing Christmas nail art? Your nails can be a stunning accessory that complements your holiday attire and adds a touch of glamour to your overall look.
In this article, we will explore the essential steps and expert tips to achieve fresh and glowing Christmas nails that will make you the center of attention at any holiday gathering.

Section 1: Preparing Your Nails
Before diving into the world of Christmas nail art, it’s crucial to ensure your nails are in optimal condition. Follow these steps to prepare your nails for the festive makeover:
1. Trim and Shape:
Start by trimming your nails to your desired length. Use a nail file to shape them into square, oval, or almond shapes, whichever suits your style and preferences.
2. Gentle Exfoliation:
Gently exfoliate your hands and nails to remove any dead skin cells. This will promote healthy nail growth and improve the overall appearance of your nails.
3. Moisturize:
Apply a nourishing hand cream or cuticle oil to keep your nails and surrounding skin hydrated. This step helps prevent dryness and promotes strong, healthy nails.
Section 2: Achieving Fresh and Glowing Christmas Nails
Now that your nails are prepped and ready, it’s time to make them shine with festive flair. Here are some expert tips to help you achieve fresh and glowing Christmas nails:
1. Base Coat Application:
Begin by applying a base coat to protect your natural nails from staining and to create a smooth surface for the nail polish.
2. Festive Colors:
Choose vibrant and festive colors that embody the holiday spirit. Classic choices include deep reds, glittery golds, and frosty whites. Experiment with different shades and finishes to create a personalized look.
3. Nail Art Techniques:
Explore various nail art techniques such as stamping, gradients, or freehand designs to add an extra touch of creativity to your nails. Snowflakes, Christmas trees, and candy canes are popular motifs that can be easily created using nail art tools or nail polish brushes.
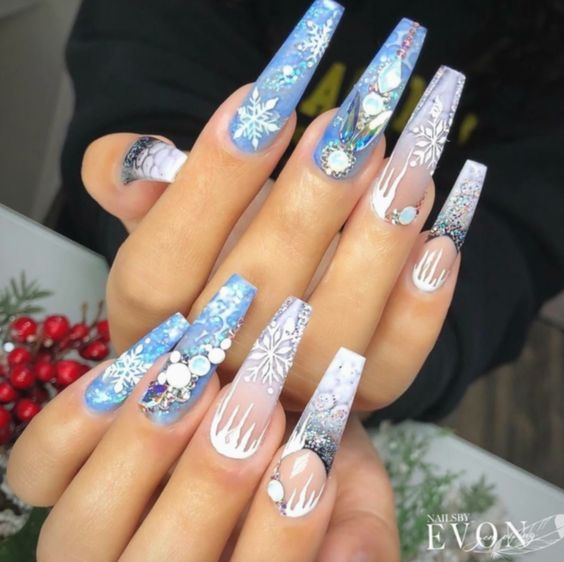
4. Glitter and Sparkle:
Embrace the shimmer and shine of the holiday season by incorporating glitter and sparkles into your nail design. Apply a layer of glitter polish, create an accent nail with glittery nail art, or add rhinestones for an extra glamorous touch.
5. Top Coat Sealing:
Once your nail art is complete, seal it with a high-quality top coat. This step not only adds shine but also helps protect your design from chipping and extends its longevity.
Conclusion:
With these essential steps and expert tips, you’re well on your way to achieving fresh and glowing Christmas nails that will leave everyone in awe. Remember to take care of your nails by maintaining proper hygiene and following a regular nail care routine. The holiday season is the perfect time to experiment with different nail art designs, colors, and finishes, so let your creativity shine and embrace the festive spirit through your dazzling nails. Get ready to make a statement at any holiday gathering with your beautiful and glamorous Christmas nails!